[Fundamentals of dot net core 1] SERVICES OF DOT NET CORE - CORE SERVICES

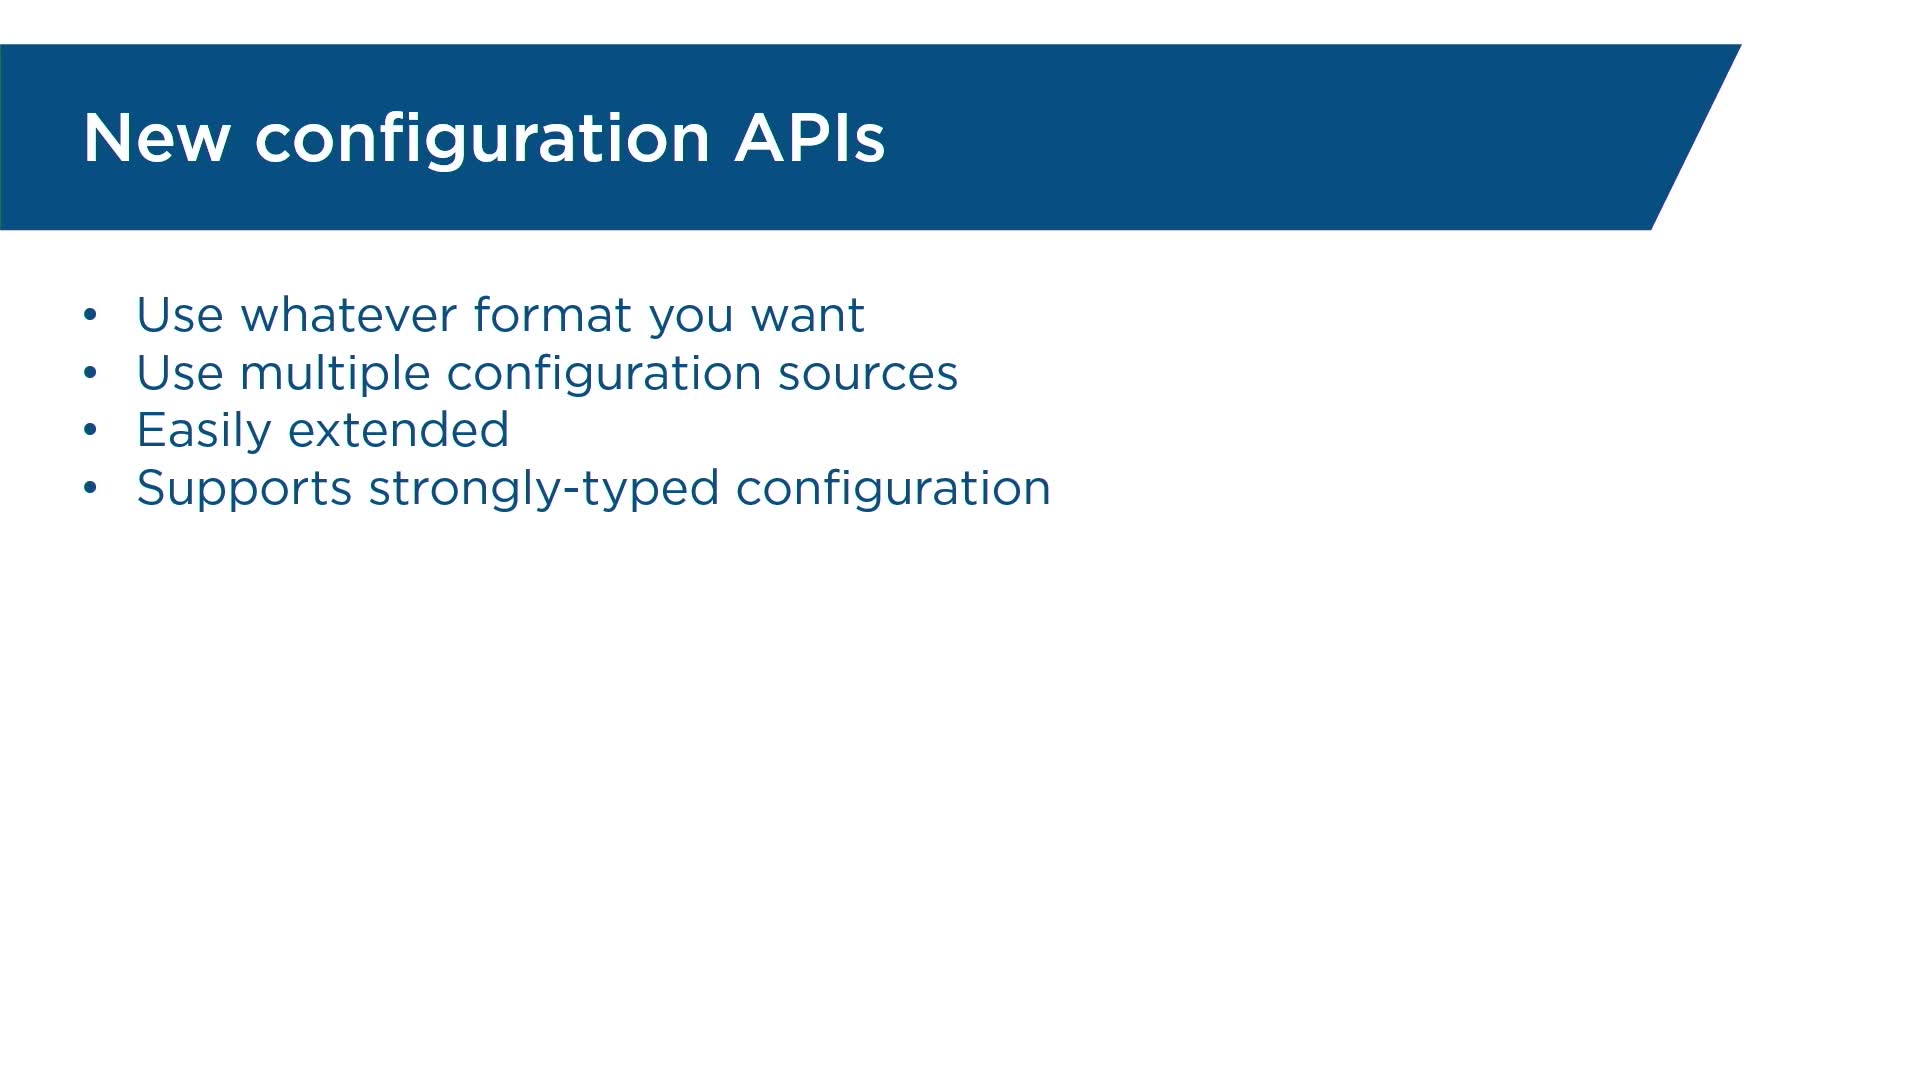
CONFIGURATION - configuration api(json)

ENVIRONMENTS - (are we on develeopement or production or staging we can program accordingly)

LOGGING - (debugging purpose, tracking issue in our app)

DEPENDENCY INJECTION - ()


ASP.NET Core Fundamentals

Out of the box, ASP.NET Core comes with an interesting set of services that you can make use of in your applications. In this course, you’ll explore some of the core services that are available out of the box in ASP.NET Core and various configuration options. Then you’ll learn about leveraging dependency injection support, defining custom environments, various logging options, how to configure logging, working with data in .NET applications, and the Entity Framework, Finally, you’ll explore various options for seeding a database, querying and manipulating data, working with the front-end user experience, bundling and minifying JavaScript and CSS files, script and link tag helpers, TypeScript, and LESS. This course was originally created by Global Knowledge (GK). 

1. Video: Explore the Core Services (it_sdafgk_02_enus_01)

Objectives

  • discuss some of the core services in the ASP.NET Core framework
There's a lot of really cool hidden gems inside of the ASP.NETCORE framework. As a developer, I love to be able to reuse functionality that's already there. And with some of these APIs that are now available, we have the ability to leverage the services inside of our own code, whether it's inside of our controllers or any service code that we might have built.

Now let's take a look at just a few examples of some of these core services, I'd like to call them, that are available for us to use. So first off, we have a new configuration API. Now this is not the same as what we used to do with the web.config file. Essentially now, we have more flexible configuration where we could determine our own configuration sources. We can create strongly typed configuration. And again, it's just a lot more flexible and easier for us to wire up.

Also, we have the ability to tap into what's known as environments. So when I say environments, I'm talking about, well, are we in production? Are we in staging? Are we in a test environment? And this might be important for you to know, because based on where we are, you might want to do different things with your code. You might want to have different types of middleware set up, or you want to have different features enabled in your application, based on where we are.

Next, we're going to take a look at logging. Now there's nothing better than a really good set of logs to let us know exactly what's happening in our application as we're going through the workflow. So we'll take a look at the log provider and see how we can plug in different types of sources to allow us to gather that rich information we could use for debugging or really just tracking down issues in our app.

And lastly, one that I think is really cool, is dependency injection. If we have dependency injection built in out of the box, we don't have to worry about setting up a third-party container if we don't want to. And also, using dependency injection allows us to create really decoupled code, and it also makes it really highly testable. So I'm really excited for you guys to come check these out. So let's go ahead and see what it's like to work with some of these.

2. Video: Registering Services with Dependency Injection (it_sdafgk_02_enus_02)

Objectives

  • describe how to leverage dependency injection to inject services into applications
Dependency injection is a core feature of ASP.NETCore. It helps with the maintainability, modularity, and even the testability of your code. Let's see how we could leverage dependency injection in our application. First, I'm going to show you some changes that I've made to our fake data service. Inside of our fake data service, I'm implementing an interface called DataService. This interface has one method in it, called GetRegistrations, that returns a task of enumerable registration models.

Back in Startup.cs, we need to go to the ConfigureServices method. This method gets called before the Configure method. And inside of here, we can register any services that will want to have injected into the dependency injection system. We do this by leveraging the IServiceCollection that gets passed into the method. Using that, we can call Add. And now, there's actually a few different scopes that we could use.

So first, we could say AddTransient. If we use this method, we'll get a new instance of whatever we register every time something asks for it. So that's like calling new, the fake data service for instance, every time we want one. Another option we have is AddScoped. AddScoped means that we'll get a new instance per HTTP request. If multiple classes or controllers ask for the same thing, then they'll all get the same instance of it within the lifetime of an HTTP request, so between the request and the response.

And lastly, we have AddSingleton. AddSingleton means that for the lifetime of the entire application, we're going to get one instance of this. So it's only going to create one instance of our fake data service for instance. I'm going to go with AddSingleton. And I'm going to register our fake data service. So first, I'm going to put in the name of the interface, IDataService. And now, I'm going to add the implementation, which is FakeData.

Now that our fake data service is registered, let's go back to our View Component and change the way that is being used. Right now you can see our fake data service is being instantiated inside of the InvokeAsync method. We want to change this. Now I'm going to create a constructor. And what I want to do is I'm going to pass in the IDataService as a parameter. So I'm just going to call this dataService. And now what I'll do is I'll create a field called dataService. This field is not created yet. So I can hit Ctrl+. in Visual Studio and the first option is Generate field.

Now, what I want to do, let's move this comment I want to change the way that we're getting this data. Let's make use of the field we just generated. So I'm going to say IDataService GetRegistrations. The good thing about relying on the interface and passing it in through the constructor is that now we can change implementation if we need to. Right now, we're getting all of this data from an in-memory data generator. But it could come from a database or even a web service.

Let's run this and see if our code is still working. Now, if you remember our route, it's /Demo. And here you see we're still receiving those lists of registrations. And here, we quickly saw how we could leverage dependency injection to inject services into the various components of our application. This definitely helps with the maintainability, but even more importantly, the testability of our code.

3. Video: Working with Environments (it_sdafgk_02_enus_03)

Objectives

  • discuss how to navigate environments in ASP.NET Core
Being able to know what environment that you're running in might be important for the way that you set up your coding. Now when we talk about environment, we're talking about well, are we in the test environment, are we in the production environment, maybe we're in staging, or maybe we're in the development environment.

If we scroll down and we head over to the Configure method, you'll see that the Configure method gets past an instance of something called an IHostingEnvironment. We can use this type to see what environment that we're in. In you look in line 39, you can see that it's checking to see if we're in the development environment. If we're in the development environment, it'll configure a certain set of middleware. And if not, we'll get an alternate set of middleware. IHostingEnvironment is actually a core service, and it's already registered in the dependency injection system for you.

So if you wanted to, you can inject this into your components or your controllers. Now, where exactly does this configuration come from? How do we know what environment that we're running in? Well, if we head over to the Solution Explorer, I'm going to right-click, and I'm going to go to Properties. If we go to the Debug section, you can see that here we have an environment variable and it's set to ASP.NETCORE environment and development. So that means that when we run this application of Visual Studio, it's going to add this environment variable as developer. Now we can easily change this to production, or staging, or whatever it is that we want. Let's say we change this to staging.

I'm going to set a breakpoint here. Now, what I'm expecting to happen is that since we're not in development anymore, and we're in the staging environment, it should skip over this break point. It says I stepped through this. Notice it completely passed over it because it's using this method to check and see if we're in development or not. And since I just set it to staging, then it's going to pass this condition.

Let's stop debugging for a second. Now using IHostingEnvironment, we have a few options that we can choose from. We can check to see IsDevelopment. We can check to see IsProduction. We can actually check to see IsStaging. But all these really are are just special cases that leverage the IsEnvironment. Now IsEnvironment actually is going to take a string. So for instance, let's say I wanted to change this to check and see if we're in some special environment. Let's call this the CecilEnvironment.

Now you remember how we change this. I can go back into Properties, Debug, and I can change this to CecilEnvironment. All I'm really trying to show you is that specifying environments is really just creating strings. Now let's run this. And now you see this is true. So I just created an environment. You can create any environment that you'd want that meets the needs of your application. And you can use the IHostingEnvironment type that's a part of ASP.NETCORE to help you figure out where exactly your application is running.

4. Video: Configuration Support (it_sdafgk_02_enus_04)

Objectives

  • describe support for configurations in ASP.NET
It's very important for us to be able to store and retrieve configuration information from our applications. Now if you're used to working with ASP.NET, you might be used to the web.config file. This is where we stored all the information, such as database connection strings, our own personal application settings, and even how our modules or handlers are set up. Well, with ASP.NET Core, things are a little bit different. Instead, we have a little bit more of a flexible configuration model.

But let's take a look and see what we came from before we understand where we're going. Whoa. Now that's a lot of stuff. This, essentially, is a traditional web.config file, and this has a lot of information here about how our applications should be set up. But this is information that comes out of the box. I didn't create any of this. This is barely a default that comes out of Visual Studio when you do a new application. Now a lot of this stuff, we don't really need to know about. And we probably don't want to work with.

Going forward into ASP.NETCORE, we can decide what types of file formats that we want to use. So if I don't want to use XML, I don't have to. I could use JSON. I could use NE files. I could use CSV files if I wanted to. I can pick and choose the format or multiple formats, if I wanted to. Another thing I think that's really cool is that we have the ability to do what's known as strongly-typed configuration.

So instead of pulling configuration values out and working with strings, I can work with objects. And I can bind my objects to the configuration values. So now, instead of my code, I can work with these strongly-typed objects. And I can get really good IntelliSense. And it allows me to have a little bit more confidence in terms of what exactly I'm working with.

5. Video: Exploring the Configuration API (it_sdafgk_02_enus_05)

Objectives

  • discuss how to explore the configuration system in ASP.NET core
The new configuration system in ASP.NETCORE provides a flexible way for you to retrieve settings from the various configuration files you might have. Now if we go inside of our Startup.cs, you'll notice inside of the constructor an instance of configuration builders being created, and it's being set up with various configuration sources. So here we could see that we're looking for a JSON file called appsettings, and it's also being set up to look for environment variables.

One of the great things about this configuration system is that information can come from anywhere. It might be a JSON or XML file. It might come from environment variables or even command line parameters. They can even be stored in a third party server and brought into the configuration system. Let's take a look inside of our configuration file. If I head back to the Solution Explorer I can open a file that's here called appsettings.JSON.

Now the name of the file is not significant, we can call this anything that we want. We'll see there's a section for logging, and also notice that I created a section called RegistrationList. Let's head over to our registration component. And we hit Control+T in visuals studio. Using this, I can quickly navigate to the various files inside of my app.

Now what you'll see here is that I'm requesting an instance of IConfigurationRoot inside of my constructor. Now by default the configuration APIs are not within the DI container for ASP.NETCORe. So that means that I had to register it myself. Instead of the Invoke-Async method, you'll see I'm requesting the page size from the configuration file. I'm just using a dictionary syntax where I hit pass in a string, and it's also going to return a string to me. And so because it's returning a string, I'm going to use int.parse to convert that value into a number.

Another option we have instead of using this, is I can call .getvalue. Calling get value I can pass a generic parameter of integer. And now I could simply request the same key like I was before. And this notice essentially will be doing the same thing. The difference is with the get value method, the difference is with the dictionary syntax if I pass in a key that doesn't exist, it's going to throw an exception. So lately I've been leaning more towards using get value. Let's run this and see what happens. OK, we can inspect the value. We can see the page size is equal to 10. And here you could see our view component is only rendering 10 records. OK, let's stop this.

If I decide to put in a value that doesn't exist, what will happen is that the default value of 0 will be returned. But maybe instead I want it to return null. And if I do that, I can use the null operator and apply a default value. So let's say if I don't have that configuration value, I want to return 25 records. Let's run this. Let me go to my demo route. Let's continue running this and you notice now here I'm returning 25 records, because the key that I specified doesn't actually exist. This is a lot nicer than getting an exception thrown if you ask me.

Now another thing that we could do is leverage strongly typed configuration. With strongly typed configuration, instead of working with strings like we are now, I can actually just work with the class. So taking a look again at our configuration, you'll see we have page size and sort by last name. What I'm going to do is I'm just going to create a new class.

I want to call this Registration Config. I want to create a property for page size, and also a property for sort by last name. What I could do now is I can go back to my startup, and instead of registering the configuration I can say, ConfigureRegistrationConfig. And what I'm going to do, I'm going to pass in that configuration section. So if you recall that configuration section was called RegistrationList.

So back in startup I'll just say Configuration.getsection. Now I'm going to pass in the registration list. Let's update our view component to use this now. So in our view component, instead of using configuration root, instead what I'll do is I'll go over to type call IOption. And I'm expecting to be working with my registration config. I'll just Control+. and include that. And I'll call this regConfig. And I'll also call this regConfig. Now what I'm going to do here is instead of relying on a string, I could say regConfig.Value. and now I could just get the page size.

So now notice instead of working with strings, I could just work with a type, and that makes it so much nicer. Let's run this. If I go to my route, page size is 10 as expected. And if I run this, you notice my view component is rendering 10 records to the screen. And that's how you could leverage strongly typed configuration in the new ASP.NETCORE Configuration System.

7. Video: Setting Up Logging (it_sdafgk_02_enus_07)

Objectives

  • discuss how to how to leverage logging inside the components of an ASP.NET Core web application
Logging is another core feature of ASP.NETCORE that you really should get familiar with. Back in the startup.cs file, I'm going to go all the way down to the Configure method. And in the first few lines, we can see that Configure is getting provided with an ILoggerFactory. A loggery factory's what you could use to create loggers, and it just so happens that the interfaces and services for these are already registered in the DI container.

Now, what's happening here in the Configure method is that using that instance of ILoggerFactory, we could attach different logging targets. So for instance, in the Configure method, we're adding a logger target of console, and another one of debug. Debug actually represents the debug window that you'll see if you're running a Visual Studio.

With this configuration in place, let's head over to our view component. And now I want to take a dependency on a logger. I want to have that injected into my constructor. But instead of saying I want an ILoggerFactory, I want to say I want an ILogger, control dot to bring in that namespace, but I want an ILogger of RegistrationListView Component. Let's reorganize this code a little bit so we could see it a little better on the screen. Now here, I can create another field. I'll just call this logger. And I'll hit control dot here to generate the field. What I'm doing here is I'm telling the DI container I want an instance of ILogger, but one with the context set to Registration View Component.

This will help us in determining where exactly these log messages are coming from. So here, if I wanted to use my logger, I could just say _logger, and there's various log methods that we could use. Here I could use LogInformation. And I'm going to use some string interpolation here. Let's say nameof Registration ListViewComponent.

Them maybe here at the bottom, I can invoke it again, and I could say, LogDebug. "Exiting InvokeAsync." Async I'll use string interpolation again, because again, that's just a little bit nicer to use, and I'll say, nameof RegistrationListView Component. Boom. There you go. So now when I run this, I'll expect to see some of that logging information get output to the console or into the debug window.

Let's run this now and see what we got. One thing I'm going to do, though, instead of running this against IIS Express, I'm going to select the name of my web application. In this case, it's WebApplication1. This change will cause Visual Studio to run my app inside of a console window, so I could see those log messages being put out to the console. There's our console window, and there are our log messages and our browser.

Now, if I head over to our route, and if I take a look inside of the window, so we have invoking RegistrationListView Component, and we also have the exiting Registration View Component. So our logs are all set up, and they're working. And here, you've seen how you can leverage logging inside of the components for your ASP.NET Core Web application.

Another great thing I like about this logging provider is not only can you use it to have different targets, but you can also have different third-party loggers, too. So if your company uses Serilog or log4net, you can plug in the code that you have already written for your third-party logger, and it'll work just fine instead of the ASP.NET Core logging infrastructure.

8. Video: Working with Data (it_sdafgk_02_enus_08)

Objectives

  • describe options for working with data in ASP.NET
Now what's an application without data? Probably a pretty boring one, right? If we're working with application that works with students, or works with courses or inventory, products or even accounting software, we're going to need to be able to store that information somewhere. And also, we're going to need to be able to retrieve it.

When we talk about information, and where data goes, there's a few options that we have. Now data might be stored inside of files, might be stored inside of a web service, might even be stored inside of a database. There might be a relational database like SQL Server, or even something like Mongo DB which is more like a document store.

With ASP.net and.NET we have a lot of options in terms of how we get access and work with data. When we talk about working with databases, particularly, we've had what's known as ADO.net . ADO.net has been in the .NET framework for quite a while, and it's essentially what allows us to access relational databases. So if you need to work with, .again, anything like Oracle or My SQL or SQL Server, you can use some of the ADO.net providers, that allow us to connect to these different databases. Also, there's tons of open source options available. So, any database that you could possibly think of, is an open source driver, or open source library, that allow us to work with.

Now out of the Microsoft space has come a really interesting technology known as Entity framework. Now in the full .NET framework, we have Entity framework 6.1, or 6.2 by the time this video comes out. And again, this allows us to connect our objects to tables. It's essentially an ORM, or object relational mapper. And now in the .NET core worlds, we have Entity framework core. It kind of made sense to make them make a Entity framework core, right, we had .NET core and we had ASP.net core. And essentially, what this is, is a lightweight version of Entity Framework.

So what is Entity framework? Like I mentioned briefly, Entity framework is an object relational mapper. So what I can do is, I could connect my objects, so lets say my student classes, with a table that represents that student. So for instance, in SQL Server, I might have a student table, and I'll have a student object.

I'll have first name and last name as properties as my student, and that will also map over to columns inside of my database. So in my c-sharp code, in my .NET code, I could work with lists of these objects, or I could work with single objects. And I could save them, I can manipulate them and I can update them. And I can have those changes reflected back into my database. And this is one of the benefits of Entity Framework. It makes this interaction between objects and data really easy.

Now, with Entity framework core, as I said before, this is a very lightweight version of Entity Framework. And it runs cross-platform, so this is going to open us up to a lot of possibility working with open source databases, as you'll see. So one of the really cool things about Entity framework core that we're going to take a look at in this section of the course, is how we can do some of the fluid mapping.

We're going to look at querying for information with LINQ, we're going to see how we can do some async updates and async querying, which is going to be really good for our performance. We're also going to see how we can work with transactions and also work with change tracking. So hold on tight, because this is going to be a really cool section.

9. Video: Creating Models and DbContext (it_sdafgk_02_enus_09)

Objectives

  • discuss the initial steps needed to get set up with the Entity framework and how to create a DbContext
In this short video, we'll take some of the initial steps needed to get set up with Entity framework in ASP.NET Core. Now I'm going to open my Solution Explorer and go to Manage NuGet Packages. What you'll see here is that I've already installed a package called Microsoft.EntityFrameworkCore.SQLite. I'm going to use SQLite here because it requires the least amount of setup, and we still get a pretty good experience with working with Entity framework.

One of the first things that I'm going to do is I'm going to need to create a DbContext. The DbContext is responsible for managing our data connections. So I'm going to just do New Item. And let's just call this demo context. And what I'll need to do here, I'm going to need to inherit from a class called DbContext. This will be coming from Entity Framework. Instead of a DbContext, we need to create a DbSet. This DbSet is going to represent the tables inside of our database. So here I'm just going to use RegistrationModel, since that's the model that we already have. I'm just going to call this Registrations.

Next I'm going to create a constructor. And our constructor is going to need to accept a type called DbContextOptions. And our DbContextOptions is going to be a generic type, in which we're going to specify our demo context. I'll just call this Options. And we'll need to pass this Options parameter down to the base constructor. Now the DbOptions is responsible for passing down some of that connection configuration information into the DbContext.

Let's head back over to our startup.cs file. What we could do here now is we could say services.AddDbContext. And we can pass in our instance of the demo context. And now we need to specify our options. So here I'm just going to say options. We're creating a lambda here. I'll just say UseSqlite. Now to use this, we need to actually bring in the Entity framework namespace. So I need to say using Microsoft.EntityFrameworkCore.

Now what I need to pass this is a data source. And this is going to be equal to, let's call this our demo.db. The way that SQLite works is that it uses a file on disk as the database. This means that I don't have to go set up SQL Server or some other piece of software to get this to work. And now we have Entity frameworks set up in our project and ready to use SQLite as our data store.

10. Video: Seeding a Database (it_sdafgk_02_enus_10)

Objectives

  • demonstrate how to use the public method called Seed to add initial data to a database
Now that we have vanity framework set up in our project, the next thing that we might want to do is add some data to our database for us to play around with. I would open up our demo context. What I'm going to do now is I'm going to create a public method called Seed. I want to use this to add some initial data to our database.

First thing that I'm going to do, this.Database.EnsureCreated. So this will make sure that our databases is actually physically there, and that the tables have already been created. Now we check and see if registrations has anything in it. If not, now I want to add some data to it. The way I'm going to get this data is I want to use that fake data service that we've been using so far. Now, what I'll do is I gather registrations. That means I need to add an async keyword to this method.

And now next, what I'll do is I'll say this.Registrations.AddRangeAsync. And now I'm going to add a range of registrations. And I'll make this method Async also. Now back in our startup, inside of our configure method, first I'm going to clean up this code a little bit to make it a little bit easier to see. Now I can actually request an instance of our demo context. And inside of the configure method, I'll call context.Seed. And since this method is actually returning a task, I'll just call a Wait.

Now out of the box, Visual Studio does not support SQLite. So I have to go out to extension and updates. Head over to online. And now I can search for an extension that could add SQLite support to Visual Studio. Here we could use SQLite SQL Server compact toolbox. Notice I have this green arrow, so that means that I already have it installed. Now I want you to run this application. All right. Everything looks like it went OK.

So what I am expecting to have happened is that inside of my startup, Seed would have been called, and my database would have been initialized. What I'm going to do is I'm going to go to Tools and select SQLite single server compact toolbox. And here I'm going to click the button that says add SQLite connection. If I hit browse, I should be able to search my bin folder. De-bug. And notice there's a demo.db This is the SQLite database that got generated when my app started up. So let's open this. Test connection. And now I can hit Close.

Now I can browse this and you'll see that I have some, I have a registration table in here. This is a simple select query. Zero rules affected. So what happened to all our data? Let's head back over to demo context. Inside of our Seed method, we're creating a fake data service, getting to registrations, also adding those registrations to our DB set. Oh, you know were missing? Any time we make a call to add or update data, we need to call save changes on the Contacts. So now I can say this.savechangesAsync. This should fix our missing data problem.

Let's run this again and see what happens. OK our apps are up and running. Our logs are coming in. OK now the apps up let's stop this. I'm going to head back over to SQLite explorer. The SQLite tools. I'll open up my demoDB and let's run this. Ah, there's our data. Now we successfully seeded data into a SQLite database using NED framework.

11. Video: Mapping Models (it_sdafgk_02_enus_11)

Objectives

  • discuss mapping models and mapping support in the Entity Framework
We've seen how Entity Framework will create a database for us, based on the classes we defined inside of our model. If you take a look at our Db context right now, you see that we have a DB set of type of registration model. And if we go to registration model, you'll see that it has four fields. ID, first name, last name, and email.

If you look over here at our table in SQLite, we can see that Entity Framework automatically turned that ID field into a primary key, and also email, first and last name, as nullable strength. The details of these field properties were determined by conventional. So for instance, the mere fact that I had a field name ID, Entity Framework used that as the primary key.

Now, if we wanted to, for instance, make first name non-nullable, we could add an attribute to it. So I could say required, I hit control dot, and I can bring in data annotations. Data annotations allows to declaratively specify how we want our models to be created. Now I have first name, last name, and email, I'll set to required.

Now, what I'm going to do, is I'm going to open up project, I'm going to open it in Windows Explorer, and we're going to delete this demo.Db file for our SQLite. Close this. If I refresh this, now our data base should be gone. Now what I'm going to do is I'm going to run our application again. OK. Our apps up and running, now we'll close this.

If I head back over to my SQL light toolbox, I'll hit refresh, let's open this to see what it looks like now. Notice how email, first name, and last name, have gone from null to not null. And this has happened because of these data attributes that I've placed on my class. Now, let's undo this. I want to show you a different way that we could specify how we want our model to be created. Inside of our Db context, let me minimize this really quick so we can see what's going on.

Inside our Db context, one thing that I could do, is I can override a method called OnModelCreating. Inside of here we can let Entity Framework know, using a fluent syntax, how we want to handle our models. The first thing that I'll do, is I'll remove this call to the base method. Now I'm going to use this model builder instance that gets past to us. And using the model builder, I could use a fluent syntax to specify exactly how I want my tables to be created. So for instance, here, I could say using the registration model, I want to look at the property called first name. And I can say that should be is required. Now I could say the same thing for the second one too.

Let's do this again. Model builder, entity, the entity we have is a registration model. And the property we want to take a look at, it just happens to be the last name. And I could say this property also should be required. Let's do the same thing for email. This code here does the same thing that those data annotation attributes are doing inside of the registration model class. So now, you have two options that you could choose from to essentially achieve the same thing.

You may have situations where you may not be able to put attributes in top of your of model class, or I know some people that generally don't like using attributes at all. Or maybe, you might be the opposite, and you don't like the fluent syntax because you think it's a little bit too much code. Either way, you have two options that you can choose from. I'm going to open up our project again and I'm going to do the same thing. I'm going to come in here, I'm going to go into the Projects folder, I'm going to delete this database and I'm going to run this again. OK, now our site is up and running, I'll stop this.

I'll head back over to our SQLite toolbox. If I refresh this page, well we actually shouldn't see anything different. Our first name, last name, and email address should still be not known. So far, we've just covered the surface of what's possible with the mapping support in Entity Framework. We can go much deeper and map things such as foreign keys, relationships, we can even change the table names and the name of the columns that they map to. I definitely recommend you taking some time and going through the documentation to see some of the other cool things you could do with the mapping support in Entity Framework Core.

12. Video: Querying Data (it_sdafgk_02_enus_12)

Objectives

  • describe how to query data using the Entity Framework
If you're familiar with querying data using a language integrated query or a link, then querying data out of Entity Framework should be a breeze for you. If we take a look at our ViewComponent, remember we had this component and it was called RegistrationViewListComponent. This took a dependency in something called an IDataService.

Well, let's change this implementation so that it relies on Entity framework instead. So here I'm just going to change this dataService, and I'm going to change this to our demo context. And I'll call this DbContext. And then I'll also change this field to DbContext. And this should also too be DbContext. I'll hit Control-dot to let Visual Studio create a field for me, and I'll just remove this field that's here.

If we scroll down, I'll have to change this to use the DbContext that we have. And now instead of saying GetRegistrations, I could just say Registrations.ToListAsync, and our code should continue working just like it did before. And I can use any of the other link operators if we wanted to. Let's run this now and see if our application still works. I'm going to go to our demo page. And here are those records that are getting returned from our database in SQLite.

Also notice one really cool thing is if I scroll down through the logs, you'll see that generated SQL is getting output to the screen. So we can see the exact query that's getting sent over to our database. And now you've seen just how easy it is to query data using Entity Framework. Again remember, you can use any of the link extension methods that you'd like.

13. Video: Manipulating Data (it_sdafgk_02_enus_13)

Objectives

  • discuss how to use the Entity framework and ASP.NET Core to implement a simple edit form
What we're going to do in this video, is see how we could use Entity framework and ASP.NET Core, to implement a simple edit form. You'll notice here that our table looks a little bit different. I've added an extra column that has an Edit button to it. If I edit, what you'll see is that it'll take us to our form with some of these values pre-filled. So now I should be able to submit any changes that I make, and expect that to be saved in the database. Same way too, if I hit the edit form with no data, I should be able to create a new entity, versus updating an existing one.

Let's head over to our code and see how we can get this done. If we take a look at our register routes, one of the things that you might notice inside of our demo controller is that we have two action methods for registry. One that responds to a get request, and one that responds to a post request. Also, if we head to the top of our class, you'll see that we're taking a dependency on the demo context that we've created in the constructor of our controller.

So we're going to use that context to update our data. What we're doing here inside of our register method, is we're checking to see if the model state is valid. Model state it is a property off of the base controller type in ASP.net core. We can use that to see if our model is actually valid or not. What we need to do here, is say, this model is valid, then let's say it's at a database.

So the first thing I'm going to do, is I'm going to check the ID. So I'm going to say model.ID, is equal to zero. If it's equal to zero, then I'm going to assume that this is a new record. So we'll say dbcontext.registrations.add, I'll add them up. If it's not, I would assume that this is an existing record that we want to update. So then I can say dbcontext.registrations.find, and what I'm going to do is I'm going to pass in model.ID.

Now if that registration is found, I could just update the properties on it. Now, this is probably not the way that you'll do updates in production, but it really helps show the concept. Now after that's done, remember what we need to do to commit our changes, is I need to call dbcontext.savechanges. and specifically, I'm going to call save changes async, and use the async version of it. So what I'll do here, is I'll have to await that, and I'll have to have this return a task of T. With this in place, I should be able to save and edit data in my form.

Let's head to the demo round, let's edit this first record. I'll change it to my name. Cecil Philip. And I'll submit this. And notice that my records change. All right, let's close this now. The next thing I want to do is actually create a new instance. What I'm going to do, is I want to open up our configuration. And I'm going to increase our page size. Let's set this to 30, so I'll be able to see all the records that get generated on a single page. OK, let's run this now. I'm going to go to register, let's call this not Cecil, submit this, OK. We have a breakpoint. For some reason, this model state valid seems to not be passing. It's not letting us submit our record.

Let's submit this again and see whats going on. Take a look inside of the model state, and it's saying I have an error. It's saying my ID is invalid. Well, since I'm creating a new record, I actually don't have an ID. So when I'm checking the model state, I don't want it to tell me about the ID. So one of the things that I could do, is I could remove this key. Because I don't want you to remove ID.

OK, let's run this now. I'm going to go to demo/register, I'm going to enter not Cecil, I'll submit the form. And now that I removed that ID from there, there we go. Now we should be passing my validation check. If I open up the form, all the way at the bottom, you'll see our new record. Not Cecil. notcecil@gmail.com Now I intentionally left this issue in here, because this might be a common scenario that you might run into. And even though this is not the cleanest way to solve it, at least you've seen one of the options you have to handle the scenario. But now you know how you could edit and update information stored in a database, using ASP.net core and Entity framework core.

14. Video: Enhancing the Front End (it_sdafgk_02_enus_14)

Objectives

  • describe various tools and methods for enhancing the front end of an application
When we talk about the front end of our application this essentially is where our users are going to interact with their software. This is where all of the pizzazz, and the colors, and the creativity really come out, and users really get to interact and use the software that we built for them. When we talk about front end assets, we think about a few different things such as CSS, that we can do the style of the application. We think about the images that we might use represent our products or whatever it is that we're really trying to have the user focus on. And also JavaScript that can add really rich interactive features to our HTML documents.

Now as we move forward in web development, a lot of tools have come out to help us really make this experience a lot better for developers. For instance, we have Bootstrap, that has some default styling and grid systems, and some reusable controls that we could use so that we just don't have to build them ourselves anymore. There's Typescript that allows us to have a little more control over the JavaScript. Makes it a lot easier for us to find errors and create really rich and usable functions using modules.

We also have things like SASS and LESS that allow our CSS to be a little bit more intelligent. We can do things like add variables or add a little bit more logic to it. And also Font Awesome that's there too. That's a freely available set of icons that we could use. It's really lightweight too so it doesn't add a tremendous amount of overhead to our app.

One of the things that we're going to talk about in this section is Web Essentials. Web Essentials essentially is a collection of extensions. It's made available by Microsoft and is freely available for Visual Studio. And it adds a lot of cool things to our application development pipeline such as bundling and minification, image optimization, it also allows us to create and use HTML snippets, and also it allows us to do JavaScript transpiling. Now we're going to look at some of these as we go on so just hold on for a second.

15. Video: Bundling and Minifying Assets (it_sdafgk_02_enus_15)

Objectives

  • demonstrate how to bundle a minification of front-end assets to reduce browser payload size
Bundling a minification of your front-end assets can greatly help reduce the size of the payload that goes over to the browser. Let's see how the web essentials extension for Visual Studio 2017 can help us out with this. Now I'm going to go into extensions and updates, and I'll search for web essentials. If you're using Visual Studio 2017 like I am, you're going to want to get Web Essentials 2017. Notice I have that green check mark to say that I already have it installed. Installing Web essentials is gonna enable a lot of additional web developer features for Visual Studio.

The first thing I want to do, is let's head over to the Solution Explorer, and look at the wwwroot folder. Remember, this is the folder that our web server is going to be hosting from, and where we're going to put all our front-end assets. Now if you open the CSS folder, you'll see we have a single CSS file, and we also have a single js file. And under lib, we have some libraries that got installed from [INAUDIBLE]. That's the JavaScript package manager that's supported by default in this template.

One of the things I might want to do, is to be able to minify and bundle these front-end assets. Let's take a look at this file in our project called bundleconfig.JSON. This is a file that we could use to specify how we want to bundle these files. And it's actually a very simple JSON file. When you take a look at it, you'll see we'll have a list of nested JSON objects, where we can specify the name of the output, and the input files that we want to use. And this will work for both CSS, and JavaScript files. So here you can see the site js, and I want to minify that file into the site.min.js.

Also, notice that the input files attribute is an array. So that means I can add additional JavaScript files to the single bundle. Since we installed web essentials, if I right click on my project, we should have a context menu that says Bundler & Minifier. And if I click on Update bundles, if I go back over to my CSS folder, notice we should have a file that says site.min.css. And if I open my JavaScript folder, I should also have a site.min.js.

Let's take a look at these files side by side to see what they look like. You can see here on the left we have our original JavaScript file, and on the right we have a minified version where all the whitespace has been stripped out. Let's go inside of our views folder to see where we can specify how we want to use this. I'm going to go into the layout.cs HTML file. And what you'll see here at the top of this layout file, is that we have some type helpers, that will help us choose which file to use, in what environment.

So in the development environment, it's having us use the un-minified versions of the CSS files, and in the staging or production version, it's going to use the minified versions of those. If we scroll down to the bottom, you can see the same thing for our JavaScript files. We'll talk a little bit more about these tag helpers in a future video.

Now, maybe instead of having to right click on the project and go to bundler and minifier every time you want to update your bundles, instead you might want to have this happen on build. What we can do instead, is we can select the bundle config, that JSON file in our project. We can right click that, go to bundler & minifier, and now we can hit enable bundle on build. And notice it's saying it's going to bring in a ms build package to help us with that. I'm going to hit yes. And now that the package is installed, I should be able to just build a project and have these files generated. So let's delete these files now.

Now let's rebuild the project. I'll right clicked and hit build. And you'll see now my files have been regenerated. So, any time I run this project, or build it, those files that I specified inside of that bundle config, that JSON file, will get bundled for me to use. And that's how the Web Essentials 2017 plug-in makes it easy for you to enable bundling and mininfication inside of your ASP.net core web application.

16. Video: Script and Link Tag Helpers (it_sdafgk_02_enus_16)

Objectives

  • describe the purpose and benefits of script and link tag helpers in ASP.NET Core
The script and link tag helpers in ASP.NET Core really add some interesting features to your markup. Let's open the _Layout.cshtml file, so I could show you what I'm talking about. Here, at the top of the file, you'll notice that under the environments tag helper for staging and production, we have some tag helpers for the link tag. Now, you know that these are tag helpers because of the way that their syntax is highlighted.

Particularly for tag helpers, that are a part of .NET Core, you'll notice that a lot of their attributes are prefixed with asp -. For instance, you can see that there's an asp-fallback-href. Now, this is not part of the standard HTML definition for a link tag. These are some enhancements that have been enabled by these tag holders. For instance, the fallback href allows you to specify an alternative file to use if your main href isn't available. Also there's the asp-fallback-test-class, that allows you to test to see whether the file that you requested was actually imported.

Another thing that you might want to do with your front-end assets is enable cache busting. If you look at the link tag for site.min.css, you'll notice that there's an asp-append-version. What this does is append a hash onto the path of the file. So now if there's any change there, now the browser can cache this particular version of the file. And if there are any changes that are made, that hash is going to change. It'll cause a browser to reload the new one.

Let's take a look at the script tag. Here at the bottom, you can see something similar's happening. There's a main src, there's a fallback src, and there's also a fallback test src. Also, we can enable cache busting with these two, with asp-append-version. Now, there's some other interesting attributes that are available in these tag helpers. If I want to see what they are, I can actually leverage IntelliSense. And I can type asp-. Notice how Visual Studio is letting me know all of the available options that are here.

For instance, there's a fallback exclude, a source include, and there's a source exclude and a source include. So we can specify which files we want, or we can even tell which files we don't want. When you think about it, that's a really powerful feature. Making use of these built-in script tags from ASP.NET Core is definitely going to add a tremendous amount of flexibility to the way that you deal with your front-end assets.

17. Video: Introducing TypeScript (it_sdafgk_02_enus_17)

Objectives

  • discuss the purpose and features of TypeScript
One of the technologies that I'm really excited to work with is TypeScript. TypeScript is a super-set of the JavaScript language. So what it does is actually add some really interesting features that makes it a lot nicer from a developer perspective. Let's talk about JavaScript and some of the things that make it a little bit of a nuance to work with.

Now, with JavaScript, because it's such a dynamic language, it's hard for you to know exactly, what type exactly, we're working with. So, sometimes you may have a method and you want to determine are you passing a list, or you're passing in a single object? Are you passing in string or are you passing in number? And depending on what these might be, you might want your code to behave differently. Also, JavaScript implementations differ depending on the browser that you're working with. The version of JavaScript that's running in Internet Explorer, or Firefox, or chrome, might be different. They might support different methods, and have different levels of API support.

Another thing with TypeScript too, is it's very hard to debug sometimes. Because, again, such a dynamic language. We're not quite sure things are all the time. And because of that too, discoverability becomes very hard. It's hard to know what properties or methods are available off a particular type. Where was it defined, and what exactly it is that's using this across the code base?

And this is why TypeScript comes in. TypeScript was created by Microsoft, and it's an open source extension to the JavaScript language. It adds something called static typing. In static typing, I could definitely know exactly what a particular type is. I can know whether I'm working with a class of students, or courses. I can know whether I'm working with an array, or dictionary. I can know whether I'm working with numbers of strengths. And based on that, I can know what types of methods and operations I can carry on those types.

Let's take a look at examples from TypeScript. Here, I'm showing you a screenshot of the TypeScript playground. On the left, what you see is some TypeScript code. I have a class that has a single property of type greeting, and I also have a method. On the right side you can see how my greeter gets turned into JavaScript. This JavaScript that's getting generated will be able to run across all these various different types of browsers.

So notice in the TypeScript I'm able to say my greeting is of type string, and my greeter that I'm actually creating is of type greeter. I can know that I have a greet method that's off of it, and I know exactly what type it returns. These type connotations are going to get compiled away. And again, the generated JavaScript is going to be one at such a level, that all my different browsers are going to be able to run it. So whether I'm running on a mobile browser, or a desktop browser, whether I'm running on my tablet, or even on my TV, I know exactly that this JavaScript is going to be able to run. And from my developer perspective, I'm able to debug through his code and know exactly how it works.

18. Video: Working with TypeScript (it_sdafgk_02_enus_18)

Objectives

  • describe TypeScript support in Visual Studio 2017
TypeScript offers some interesting features on top of your JavaScript code, such as static type checking, interfaces, and even the ability to use some ES 2016 features. In this video, I want to show you some of the TypeScript support in Visual Studio 2017. Now, inside of our wwwroot folder, I want to go into the js folder and I'm just going to add a new TypeScript file. I'll select Web, scripts, and here you'll see I have a TypeScript file template. I'll just call this file notifier.

Now, what this presented me with is an empty TypeScript file. What you want to do, is I want to create a class, and I'm going to call it notifier. Notice how Visual Studio already starting to apply syntax highlighting to it. Now, I want to add a function to my class, called notify. And notify is just going to call toaster. Toaster's that library that we've been using to show notifications to the screen.

And this is going to got say toaster.success. And just like before I'm just going to say page loaded. Notice here, in our code on line 3, I'm getting a red line under toaster. The TypeScript of compilers is letting us know that they can't find toaster. And this is because toaster itself is actually declared as a global variable. But TypeScript doesn't know that.

So one of the things that we have to do is add a declaration for it. So I can say declare var, and I will say toaster. This just let's TypeScript know that toaster is defined globally elsewhere. And if you recall, toaster is actually being pulled in from our limp folder. Now, before we compile our TypeScript file, there's one more thing we need to do.

We need to add something called ts config, or the TypeScript configuration file. Back in the add new item menu of Visual Studio, I'm going to select type scripts, JSON configuration file, ts config, and I'm just going to say Add. This file allows us to specify the configuration options that's going to be used by the TypeScript compiler. What I need to do here is let it know what files I want it to include. Specifically, I want it to grab the files that are inside of my wwwroot folder. So now it's going to be in wwwroot/**, so this is going to let us know to grab any cell folders, and /*. Now because this is a ts config file, the star lets us know that I want it to grab any TypeScript files that are inside of that folder.

Next, I'm going to right click of our project, and we hit build, and now notice under notifier, on this dropdown, our notify.js file has been created. Now, what I want to do, is I want to open this side by side so you can see what the compiled code looked like, versus what the original TypeScript code looked like. And as you can see here, TypeScript compiled away the declaration file, and it also turned our notifier class into a simple function.

This way older browsers that don't yet support classes, and some of the newer versions of JavaScript, would still be able to run my code. And there you have just a taste of what you could work with TypeScript, inside of Visual Studio 2017. If you want a more in-depth look into TypeScript, definitely check out some of our other courses here on Global Knowledge.

Course HTML Resources

Configure your application

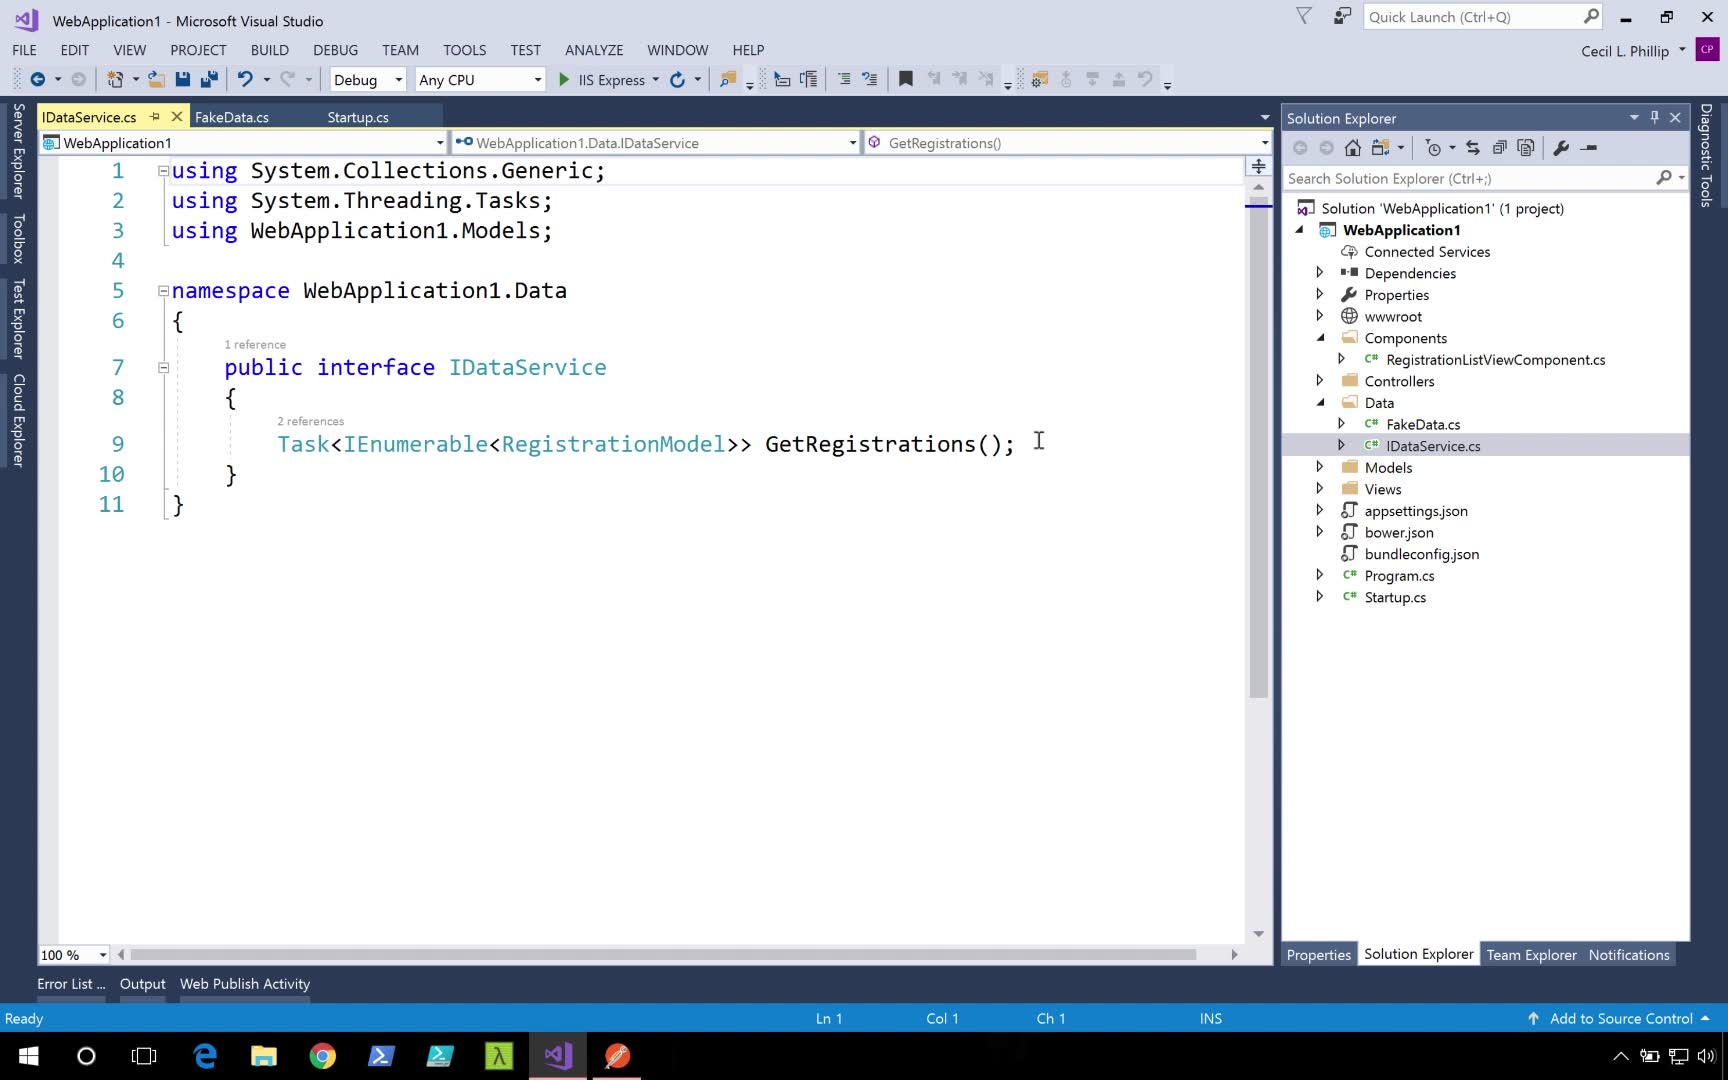
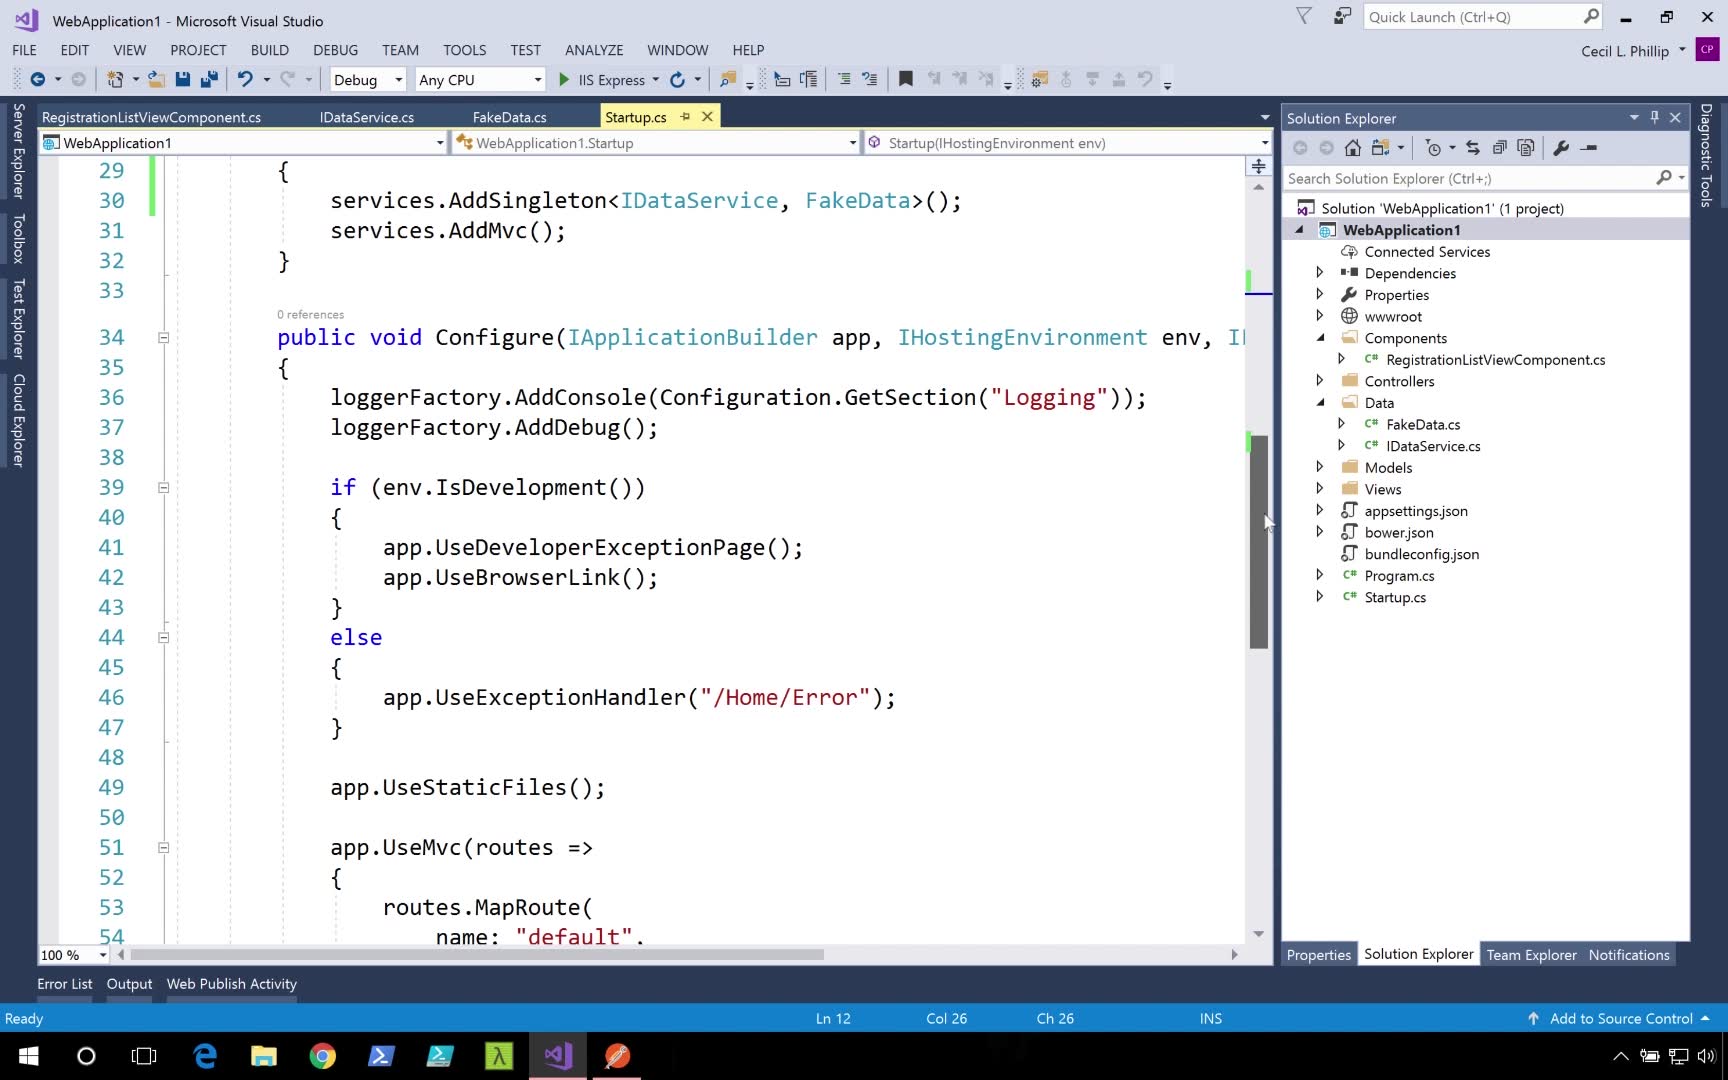
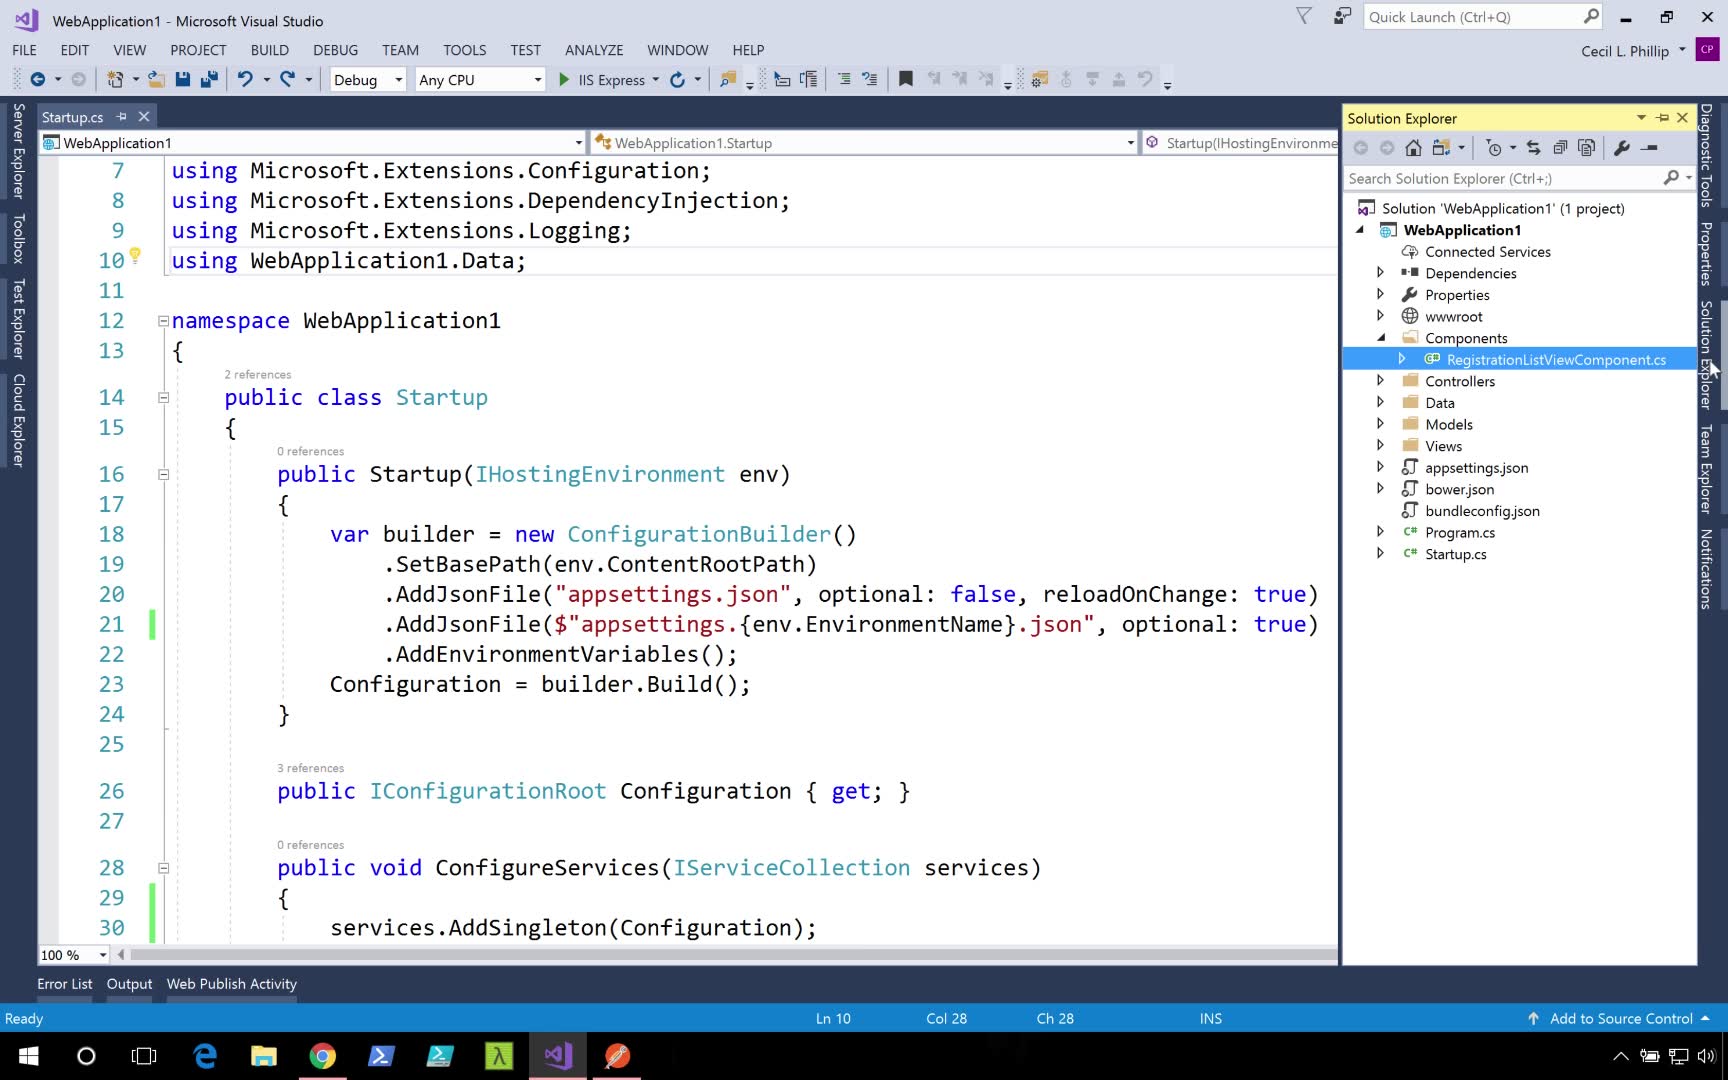
Out of the box, ASP.NET Core comes with an interesting set of core services that you can make use of in your applications. In this section of the course, we'll explore configuration and logging APIs, as well as the built-in dependency injection container.

Objectives

  • Register and inject services
  • Set up various configuration sources
  • Configure third-party loggers
  • Bind to strongly-typed configuration models

Use your own container

The built-in dependency injection container that comes with ASP.NET Core should be able to handle the needs of most applications. However, there may be situations where you need to plug in another. There are many open source dependency injection containers for .NET that have a much richer feature set, such as StructureMap, Autofac, and Ninject.

Setting up Autofac

Many container libraries today already have NuGet packages that make integration into ASP.NET Core much easier. For instance, to use Autofac you could need to install the Autofac.Extensions.DependencyInjection package from NuGet.

In your Startup.cs file, we're going to add another method called ConfigureContainer. Just like Configure and ConfigureServices, ConfigureContainer will get discovered and executed by convention when your application starts.

public void ConfigureContainer(ContainerBuilder builder) {  
builder.RegisterType<FakeDataService>().As<IDataService>();
}

Inside ConfigureContainer, you would register services into the container using their native APIs.

The last thing that needs to happen is for you to register the container early on in the bootstrapping of your application. That happens in the Program.cs file where WebHostBuilder is getting created. Because we're using Autofac for this example, we will make a call to ConfigureServices(services => services.AddAutofac()) off of the WebHostBuilder instance.

public static void Main(string[] args)  
{
var host = new WebHostBuilder()
.UseKestrel()
.ConfigureServices(services => services.AddAutofac())
.UseContentRoot(Directory.GetCurrentDirectory())
.UseIISIntegration()
.UseStartup<Startup>()
.Build();
host.Run();
}

With this in place, you will have fully integrated a third party dependency injection container (Autofac) in your application.


Add a third-party logger

If you would like to make use of a third-party logger in ASP.NET Core, it's actually pretty easy to do. Most .NET loggers today have great support for doing this already. Here, we will set up Serilog. Serilog is a an open source logging library for .NET that is built with powerful structured event data in mind.

Install NuGet packages

To get started with Serilog in your ASP.NET Core projects, install the following NuGet Packages:

  • Serilog.Extensions.Logging - Adds support for the new Logging APIs
  • Serilog.Sinks.RollingFile - Adds support for rolling files

Setting up the logger

The code below is what we'll use to set up the logger in Startup.cs.

public Startup() {
Log.Logger = new LoggerConfiguration()
.MinimumLevel.Debug()
.WriteTo
.RollingFile(Path.Combine(env.ContentRootPath, "logfile-{Hour}.txt"))
.CreateLogger();
}

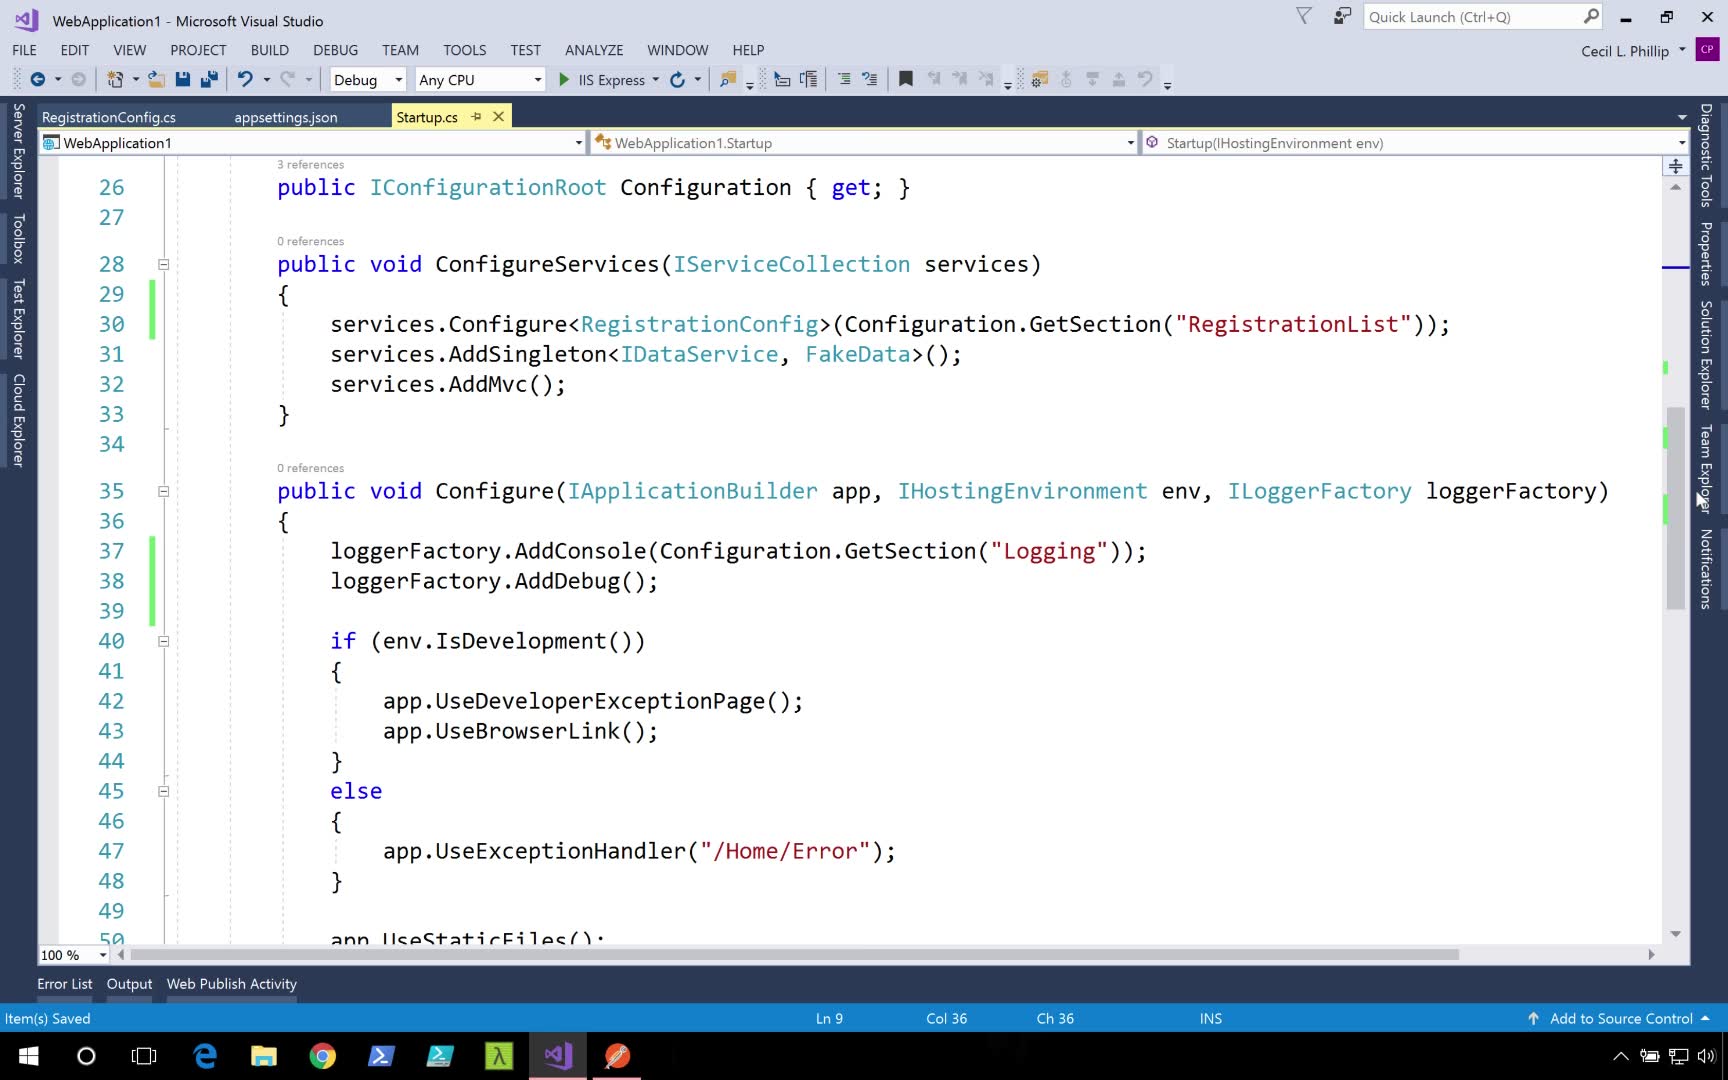
public void Configure(IApplicationBuilder app,
IHostingEnvironment env,
ILoggerFactory loggerFactory)
{
loggerFactory.AddSerilog();
}

Serilog exposes a static Log.Logger instance that can be used to configure logging. In the code above, we make use of the LoggerConfiguration to set the log level and also the sink. Sinks are where Serilog sends its log data. In this case, we're sending data to a rolling file sink and providing a template for naming the files. With this setup, the rolling file sink will create a new log file every hour as logs get created. This is just one of the many sinks that are available for Serilog.

The last crucial piece of the configuration happens in the Configure method, where we call the AddSerilog extension method on the loggerFactory. Now, your application will send its logging data to Serilog. I told you it was easy!


Access data with Entity Framework Core

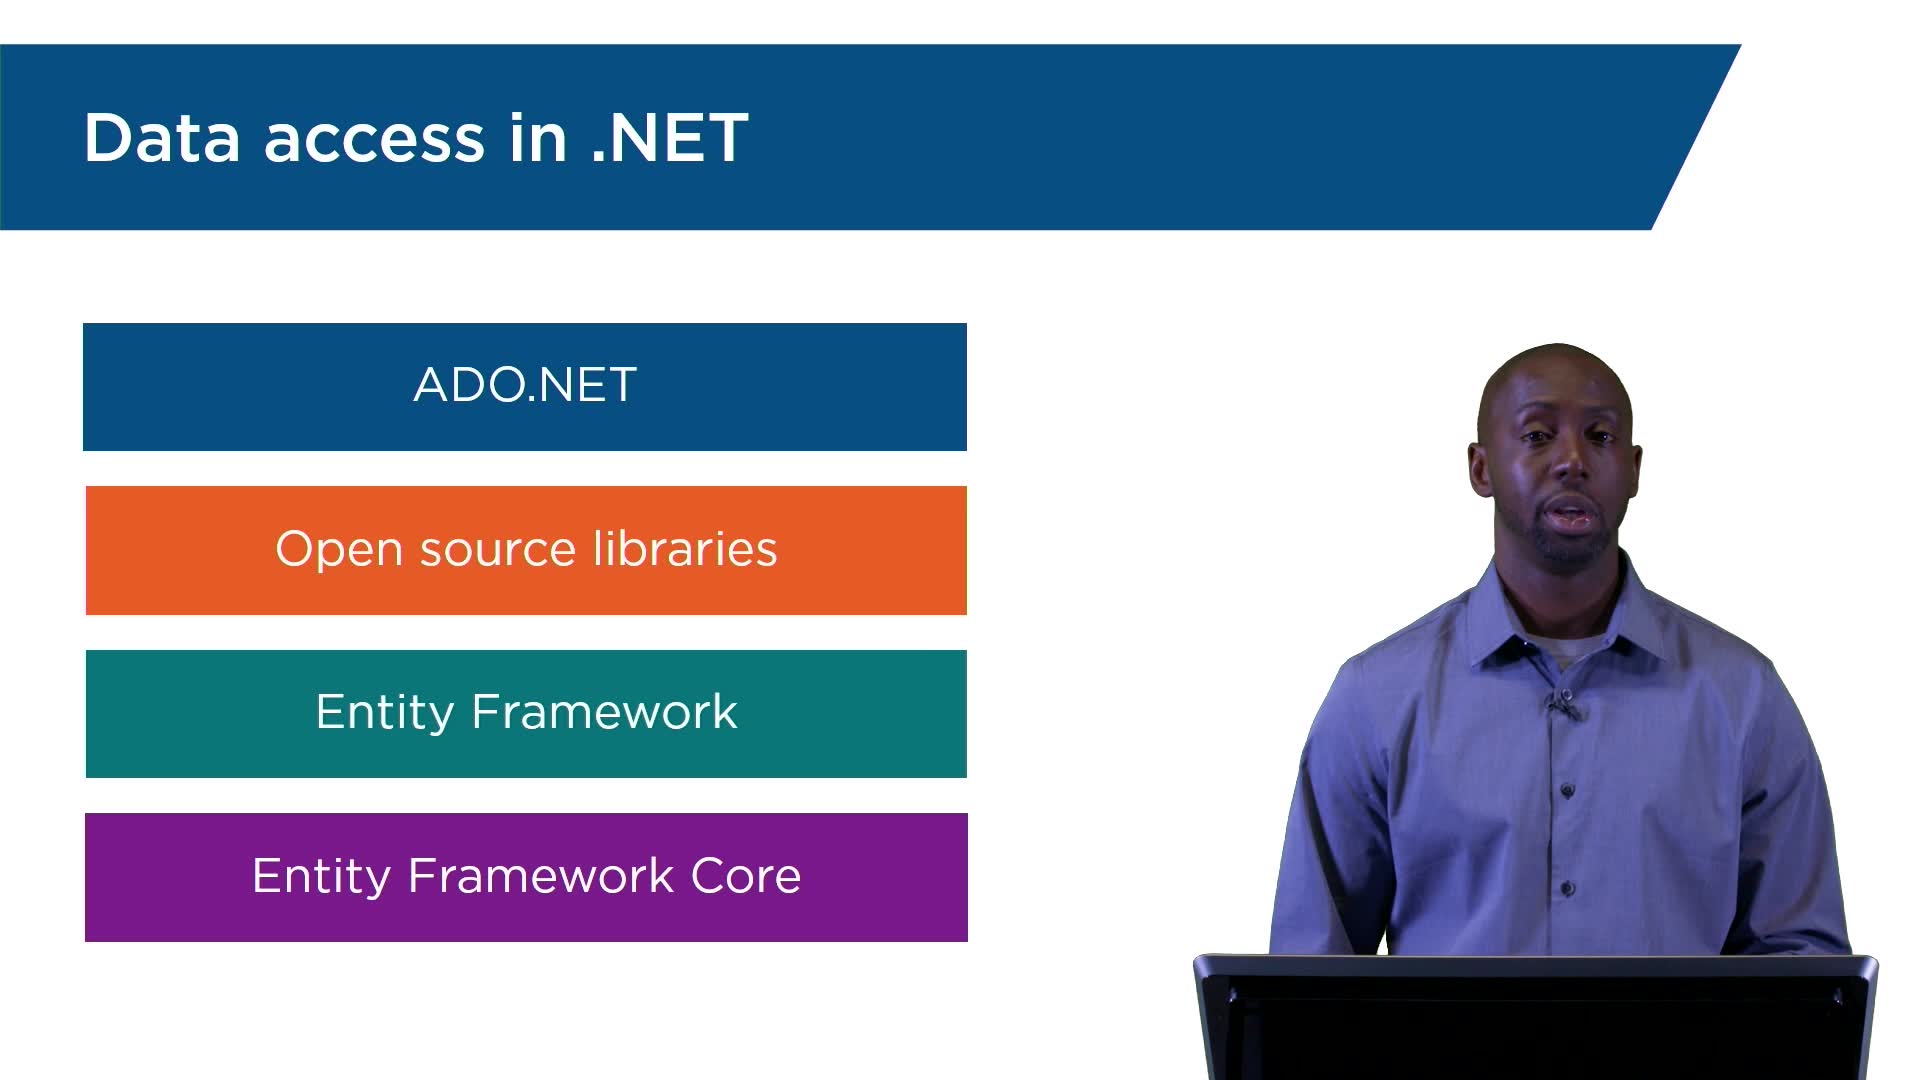
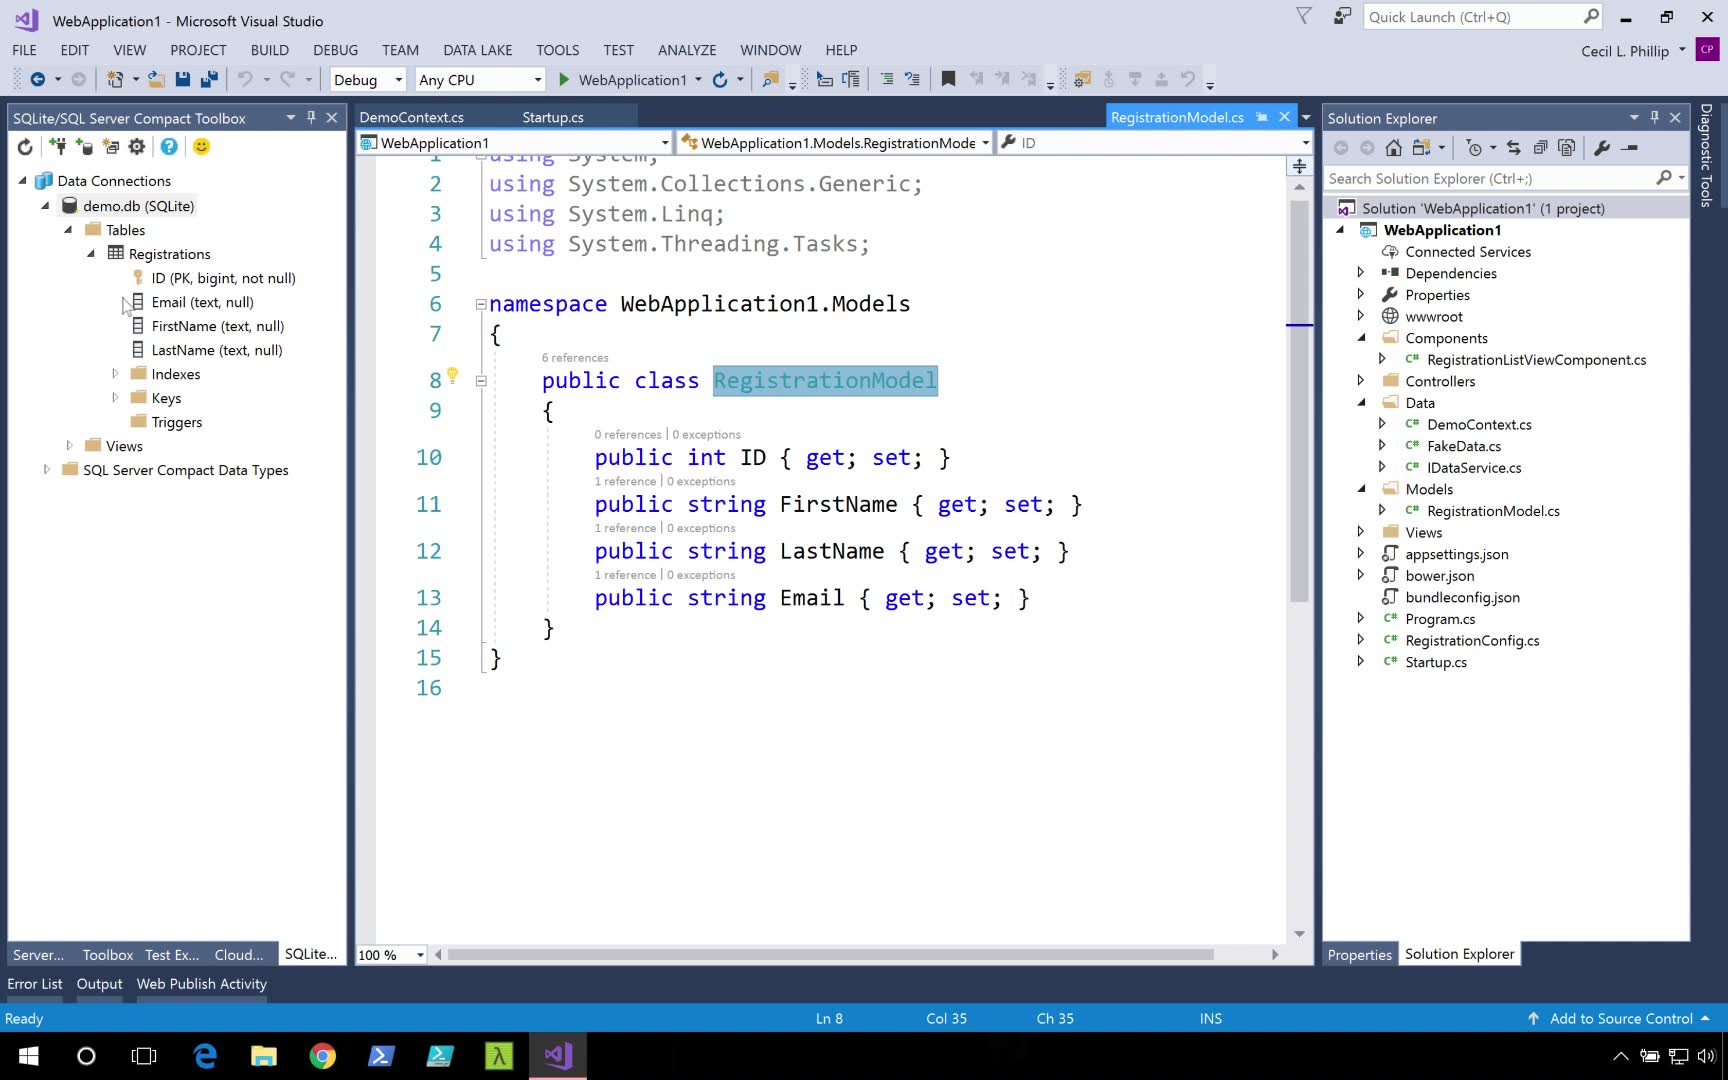
Every application will need to either consume or produce data in some form. As Software Developers, we are very familiar with leveraging databases to storage the data for our applications.

In the .NET ecosystem, we have a variety of libraries at our disposal that will help us easily incorporate the use of databases in our applications. Entity Framework is one such library provided by Microsoft that allows us to connect with relational database systems such as SQL Server, MySQL, and even PostgreSQL.

Objectives

  • Configure Entity Framework Core in an ASP.NET Core application
  • Query data from a database using LINQ
  • Update database records using the DbContext
  • Work with an in-memory Data Provider

Entity Framework Core in memory

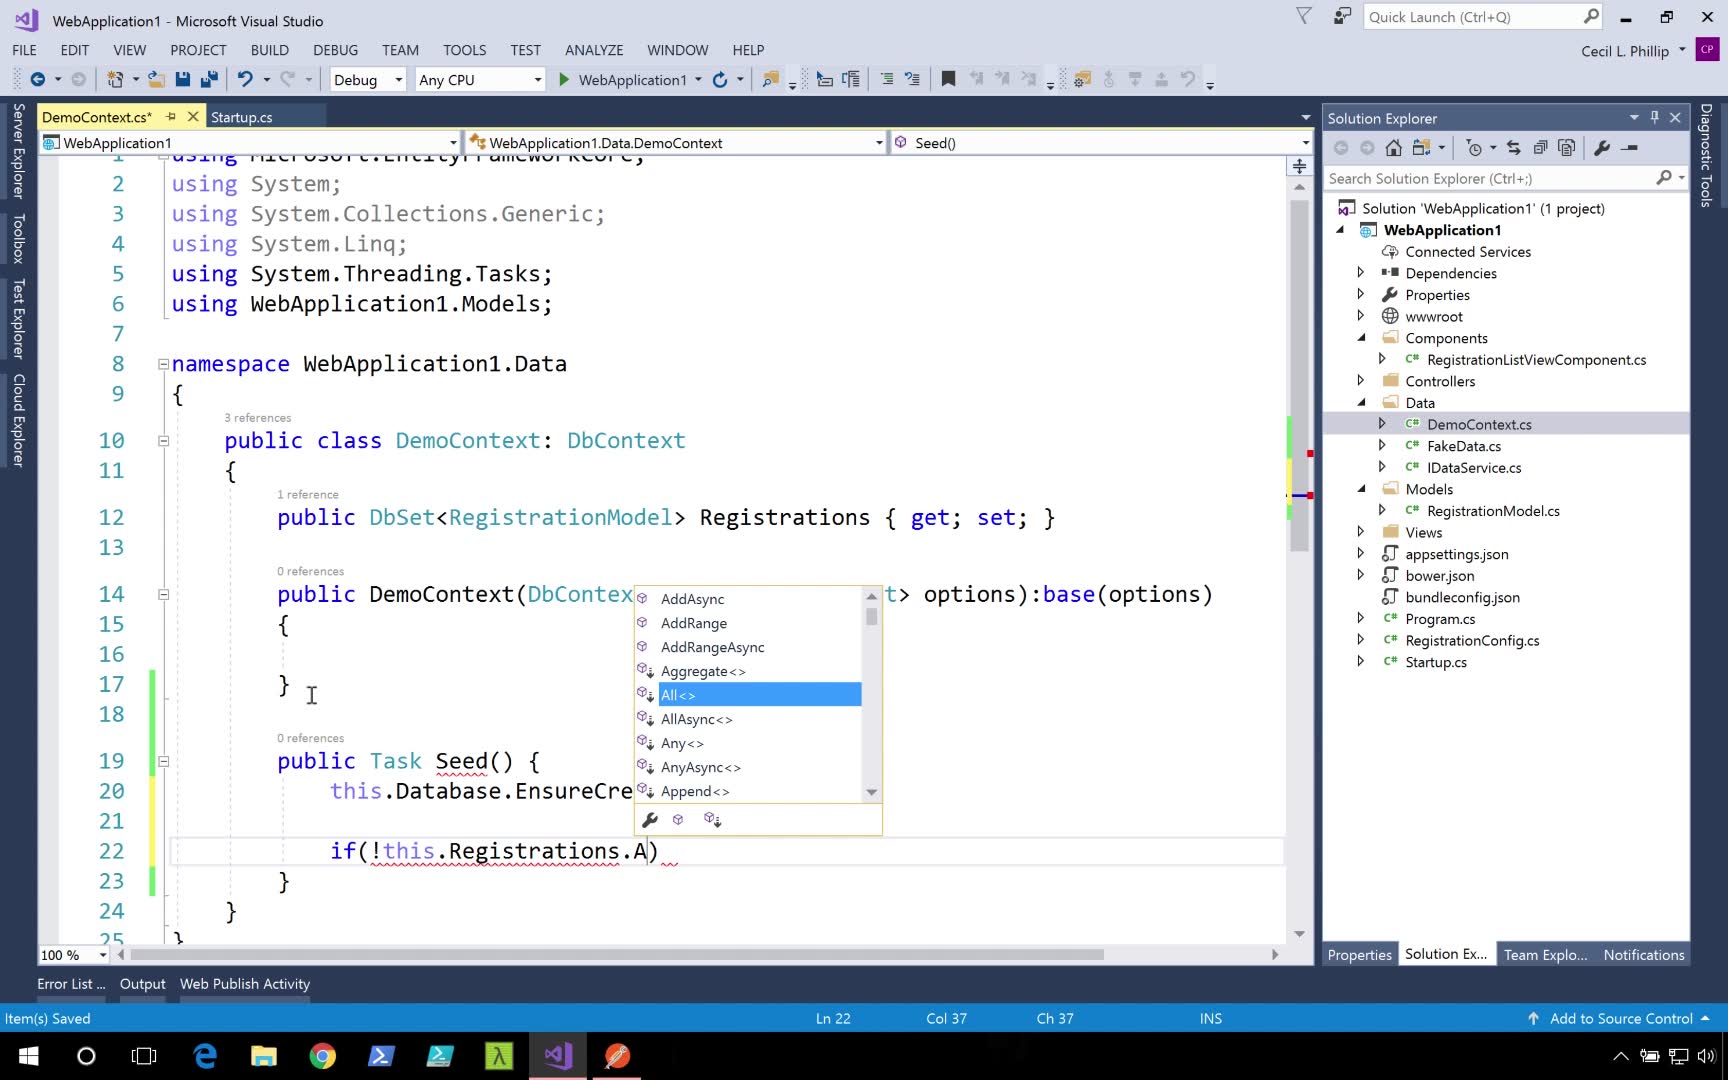
As you're building out your applications with Entity Framework, sometimes you would like to actually run your application logic without having to set up a database. Another scenario may be when you're writing tests for your code and don't want to go through the hassle of constantly having to restore your database to a given state. Luckily, with Entity Framework Core, we have the option for leveraging an in-memory data provider.

Setting up the provider

To get started with the in-memory provider, the first thing you'll need to do is install the Microsoft.EntityFrameworkCore.InMemory NuGet package.

If you recall what our Entity Framework setup code looked like in the Startup's Configure method:

public void ConfigureServices(IServiceCollection services)
{
services.AddDbContext<DemoContext>(options => options.UseSqlite("Data Source=demo.db"));

...
}

This current setup leverages SQLite. To use the in-memory data provider, we can simply replace the call to UseSqlite to UseInMemory.

public void ConfigureServices(IServiceCollection services)
{
services.AddDbContext<DemoContext>(options => options.UseInMemory());

...
}

The rest of your Entity Framework Core code can remain the same. You can run now your application or execute your tests without having to set up a real database.

Disclaimer The in-memory provider was not meant to be used in production scenarios. Also, it does not alleviate the need to run proper integration tests and profiling on your application with a real database.


Manage front end code

Presenting your clients with a rich user experience can be critical to the success of your web applications. Even if your software services internal clients, having a fast and responsive UI might be key the greatly improving their productivity.

In the front-end web development space, there are so many tools and techniques to choose from. Between built-in support in ASP.NET Core and a few handy extensions in Visual Studio, developers have all the support they need to create beautiful web applications.

Objectives

  • Enable bundling and minification
  • Compile LESS files
  • Compile Typescript to JavaScript
  • Work with the link and script Tag Helpers

Final Practice: Enable bundling for front-end assets

Objective

In this practice exercise, you will learn how to bundle your front-end assets using the Web Essentials extension for Visual Studio.

Instructions

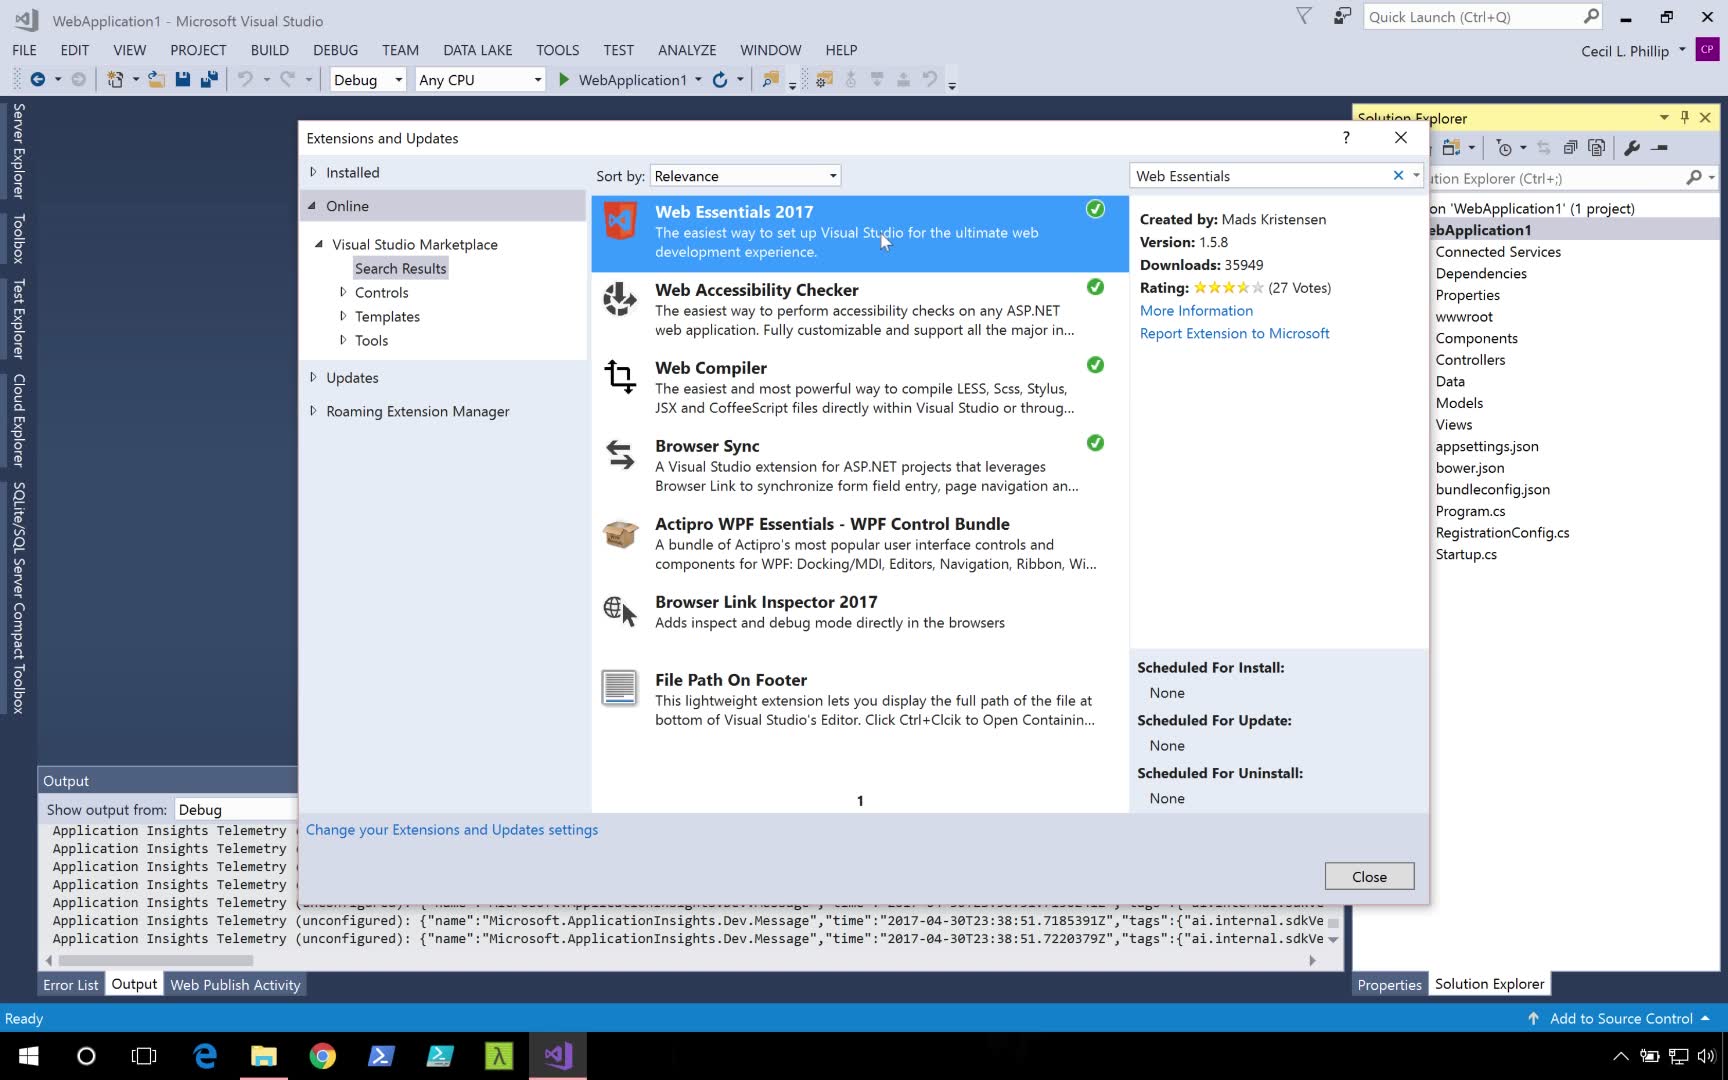
Download Bundle-Practice.zip. The zip file should contain a Visual Studio solution with a single project. The provided project should be compatible with Visual Studio 2017 and later.

1. Install Web Essentials
In Visual Studio, go to the Tools menu and select Extensions and Updates. Install the Web Essentials 2017 extensions for Visual Studio. You will be required to restart your IDE to complete the installation.

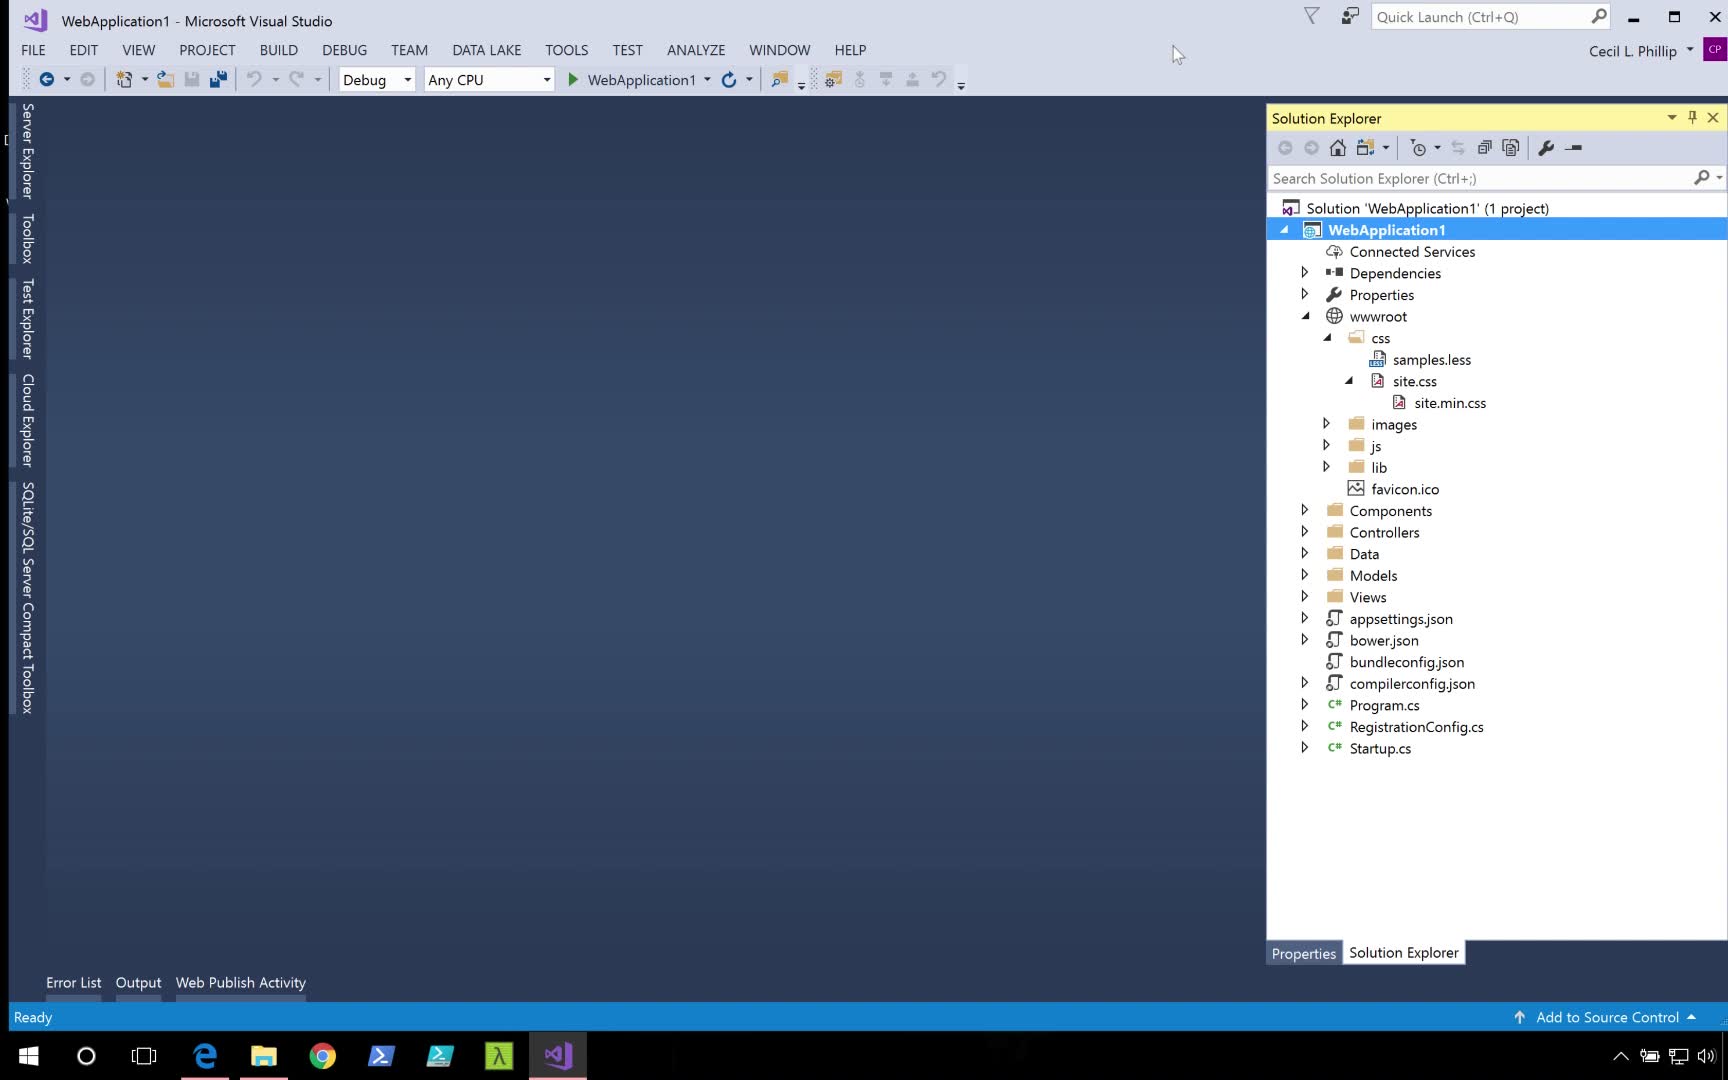
2. Create .min files for your CSS and JavaScript files
Open the wwwroot folder and locate the site.css and site.js. These are the files that will be used for bundling and minification. Next, open the bundleconfig.json file. This file contains the configuration for what the input and output files will be.

Right-click on the project, select Bundler & Minifier, and then select Update Bundles. If you inspect your project, you should now see that minified versions of your files have been generated.

3. Complete the exercise
Once you have finished this exercise, and viewed the solution video if necessary, you can proceed to the next activity. If you encounter any problems and want one of our instructors to review your work, you can create a zip file containing the Visual Studio project files and click on the Upload button to submit your completed work for review.

Comments

Popular Posts